

CI/CD using AWS, Jenkins, Docker, and Kubernetes


Introduction :
In this article, we will do CI/CD using AWS, Jenkins, Docker, and Kubernetes.
Here’s a high-level overview of the process of deploying a Spring Boot application on Kubernetes:

Continuous Integration and Continuous Deployment (CI/CD) is a set of practices that enable software development teams to automate the process of integrating code changes, testing, and deploying applications quickly and efficiently. AWS, Jenkins, Docker, and Kubernetes are popular tools used in the CI/CD pipeline to streamline software development and deployment.
PREREQUISITES
1) AWS LOGIN
2) DOCKER HUB LOGIN
3) GITHUB HUB LOGIN
Clone this Repository :
https://github.com/HARSHALJETHWA19/jenkins-shared-library1-main
https://github.com/HARSHALJETHWA19/spring-cloud-kubernetes-main
Setups to do CI/CD using AWS, Jenkins, Docker, and Kubernetes:
CREATE A T2.MEDIUM UBUNTU EC2 INSTANCE IN AWS IN REGION

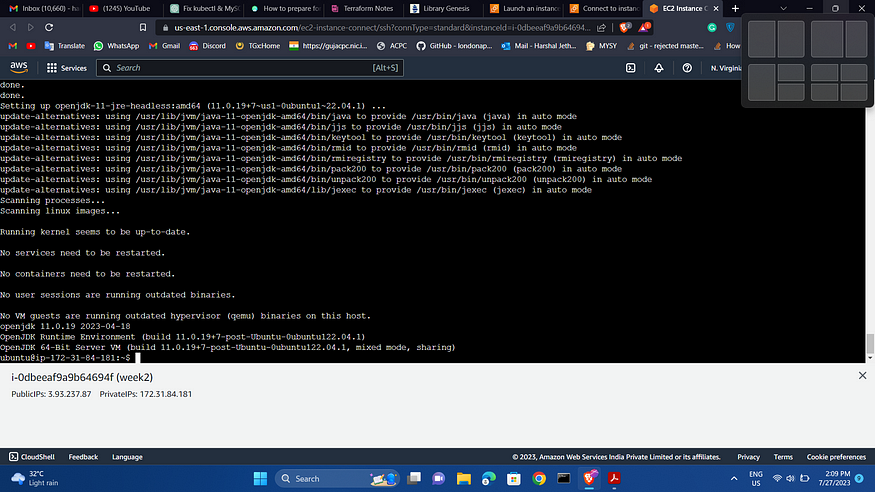
Install JDK on AWS EC2 Instance
sudo apt-get update
sudo apt install openjdk-11-jre-headless -y
java --version
Install and Setup Jenkins
curl -fsSL https://pkg.jenkins.io/debianstable/
jenkins.io-2023.key | sudo tee
/usr/share/keyrings/jenkins-keyring.asc > /dev/null

echo deb [signed-by=/usr/share/keyrings/jenkinskeyring.
asc] https://pkg.jenkins.io/debian-stable
binary/ | sudo tee /etc/apt/sources.list.d/jenkins.list >
/dev/null
sudo apt update
sudo apt install jenkins
sudo systemctl status jenkins


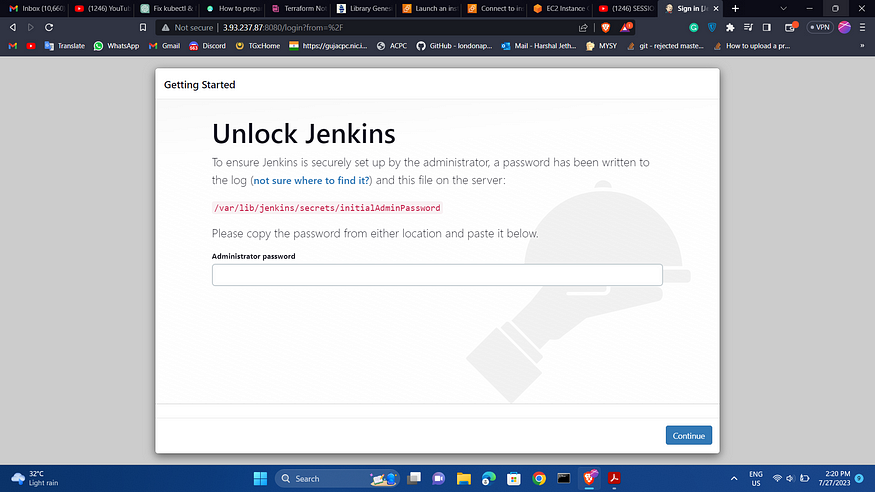
Setup Jenkins:
Now go to AWS dashboard -> EC2 -> Instances(running)and click on Jenkins-EC2
- Copy the Public IPv4 address.
- Change the SG to open for Jenkins.
- Alright now we know the public IP address of the EC2 machine, so now we can access Jenkins from the browser using the public IP address followed by port 8080.
- Copy the below key and paste it on JENKINS
- After completing the installation of the suggested plugin you need to set the First Admin User for Jenkins.
Update visudo and assign administration privileges to jenkins user :
- Open the file /etc/sudoers in vi mode
sudo vi /etc/sudoers
- Add the following line at the end of the file

jenkins ALL=(ALL) NOPASSWD: ALL
- After adding the line save and quit the file.Now we can use Jenkins as root user and for that run the following command
sudo su - jenkins
Install Docker with user jenkins :
sudo apt install docker.io
docker --version
docker ps
sudo usermod -aG docker jenkins
sudo reboot
Install and Setup AWS and EKS CLI :
sudo apt install awscli
curl "https://awscli.amazonaws.com/awscli-exe-linuxx86_
64.zip" -o "awscliv2.zip"
unzip awscliv2.zip
sudo ./aws/install --update
aws –version

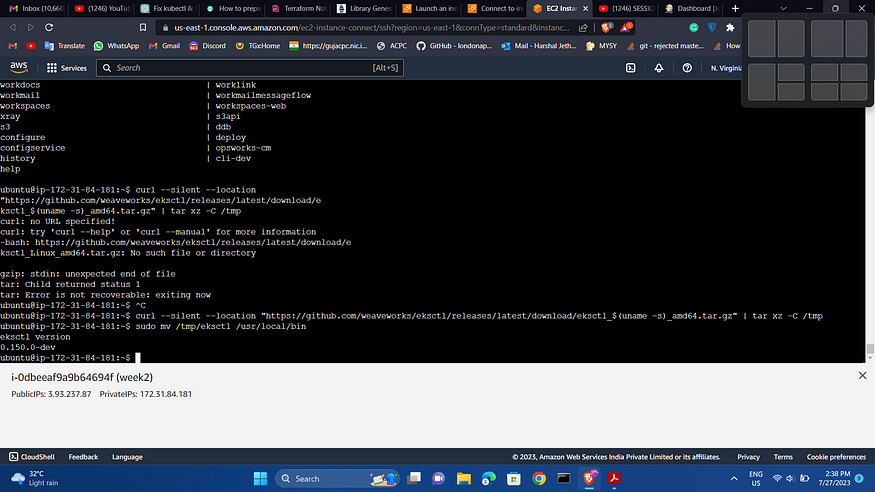
Eksctl installation:
curl --silent --location "https://github.com/weaveworks/eksctl/releases/latest/download/eksctl_$(uname -s)_amd64.tar.gz" | tar xz -C /tmp
sudo mv /tmp/eksctl /usr/local/bin
eksctl version
Configure the AWS CLI so that it can authenticate and communicate with the AWS environment :
aws configure
Once you execute the above command it will ask for the following information -
1. AWS Access Key ID [None]: YOUR ACCESS KEY
2. AWS Secret Access Key [None]: YOUR SECRET KEY
3. Default region name [None]: REGION
4. Default output format [None]:
You can click on the Create New Access Key and it will let you generate — AWS Access Key ID, AWS Secret Access Key
Install and Setup Kubectl :
curl -LO https://storage.googleapis.com/kubernetesrelease/
release/v1.23.6/bin/linux/amd64/kubectl
chmod +x ./kubectl
sudo mv ./kubectl /usr/local/bin/kubectl
kubectl get pods
(WILL GIVE ERROR)

Creating an Amazon EKS cluster using eksctl :
IT WILL TAKE 15–20 MINUTES TIME TO CREATE THE CLUSTER
Now in this step, we are going to create Amazon EKS cluster using eksctl
You need the following in order to run the eksctl
command
1. Name of the cluster : — name first-eks-cluster
2. Version of Kubernetes : — version 1.24
3. Region : — region us-east-1
4. Nodegroup name/worker nodes : — nodegroupname worker-nodes
5. Node Type : — nodegroup-type t2.micro
6. Number of nodes: — nodes 2
eksctl create cluster --name first-eks-cluster --version 1.24 --region us-west-1 --nodegroup-name workernodes --node-type t2.micro --nodes 2


Add Docker and GitHub Credentials on Jenkins:
- Setup Docker Hub Secret Text in Jenkins
You can set the docker credentials by going into -
Goto -> Jenkins -> Manage Jenkins -> Manage Credentials -> Stored scoped to jenkins -> global -> AddCredentials [ GIVE YOUR DOCKER HUB CREDENTIALS ]

Setup GitHub Username and password into Jenkins:
Now we add one more username and password for GitHub.
Goto -> Jenkins -> Manage Jenkins -> ManageCredentials -> Stored scoped to jenkins -> global -> AddCredentials

ADD THE EKS IAM ROLE TO EC2 :
GO TO IAM -> CREATE ROLE
ADD JENKINS SHARED LIBRARY :
Go to Manage Jenkins -> Configure System -> GlobalPipeline Libraries ->
Give Library name — jenkins-shared-library
Default Version — main
Project Repository — https://github.com/HARSHALJETHWA19/jenkins-shared-library1-main

Build, deploy and test CI/CD pipeline :
Create new Pipeline: Go to Jenkins Dashboard or
Jenkins home page click on New Item
Pipeline Name: Now enter Jenkins pipeline name and select Pipeline
Add pipeline script:
Click on Configure -> Select Pipeline >https://github.com/HARSHALJETHWA19/spring-cloud-kubernetes-main/blob/main/spring-cloud-kubernetes-main/kubernetes-configmap-reload/Jenkinsfile -> Copy that Jenkinsfile -> Paste it in Pipeline Script in Jenkins

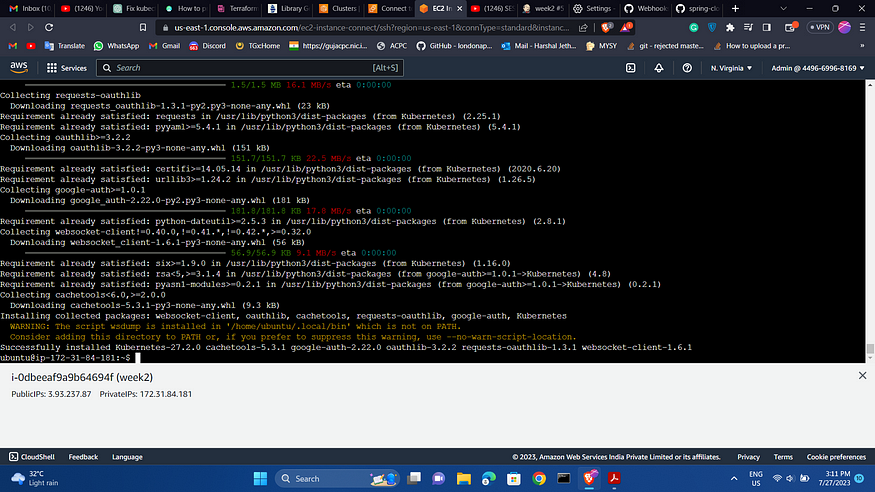
Ansible setup :
sudo apt update
sudo apt install software-properties-common
sudo add-apt-repository --yes --update
ppa:ansible/ansible
sudo apt install ansible
sudo apt install python3
sudo apt install python3-pip
pip3 install Kubernetes
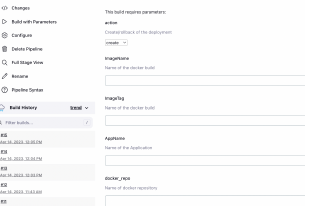
SELECT BUILD WITH PARAMETERS [ IF FAILS AGAIN START THE PIPELINE ]
Action — create
ImageName — kubernetes-configmap-reload
ImageTag — v1
AppName — kubernetes-configmap-reload
Docker_repo — Give your Docker Hub account ID
DOCKER LOGIN
PIPELINE WILL PASS

Add Webhook :
IN GITHUB PROJECT → SETTINGS -> WEBHOOK -> URL –> http://<ec2_ip>:8080/github-webhook/ -> ONLY FOR PUSH EVENTS

IN JENKINS -> GO TO GENERAL TAB -> BUILD TRIGGERS -> ADD GITHUB WEB HOOK TRIGGER
DELETE EKS CLUSTER [ PLEASE NOTE FROM ALL STEPS HAVE TO BE DONE AS JENKINS USER IN UBUNTU SYSTEM ]
eksctl delete cluster --name first-eks-cluster
Follow me :
Linkedin: https://www.linkedin.com/in/harshaljethwa/
GitHub: https://github.com/HARSHALJETHWA19/
Twitter: https://twitter.com/harshaljethwaa
Thank You!!!
Please feel free to contact me on LinkedIn if you are unsure about anything or are having trouble understanding anything about the project.