

Ansible Playbooks for Nginx and MongoDB Configuration


#10WeeksOfCloudOps
In this blog post, We will Create three Server: one will be the Master and the other two will be the Slave or Remote Server. and then we will install Nginx and MongoDB
This Blog is for Installing Nginx and deploying Websites.
Part 2: https://medium.com/@harshaljethwa19/ansible-playbooks-for-nginx-and-mongodb-configuration-2-f34828d4c937
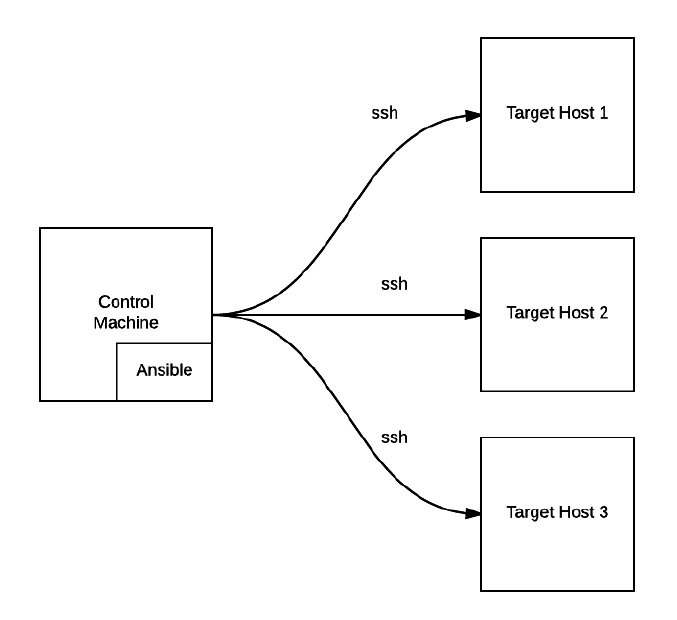
Introduction Ansible is an open-source automation engine that allows you to automate various IT tasks, including server provisioning, configuration management, application deployment, and more. Ansible works by executing small, modular scripts called “Playbooks,” written in YAML format, to define the desired state of servers and services.
The Git repository of the below project is pasted in below.
github.com/HARSHALJETHWA19/ansible-project
Part 1: Nginx Installation and Application Deployment Across Multiple Servers using Ansible & Jenkins.
Setup 1:
First, Create Three AWS EC2 Instances. One will be the Master and the other two will be the Slave or Remote Server. Prefer to use the same KeyPair for all EC2 servers.

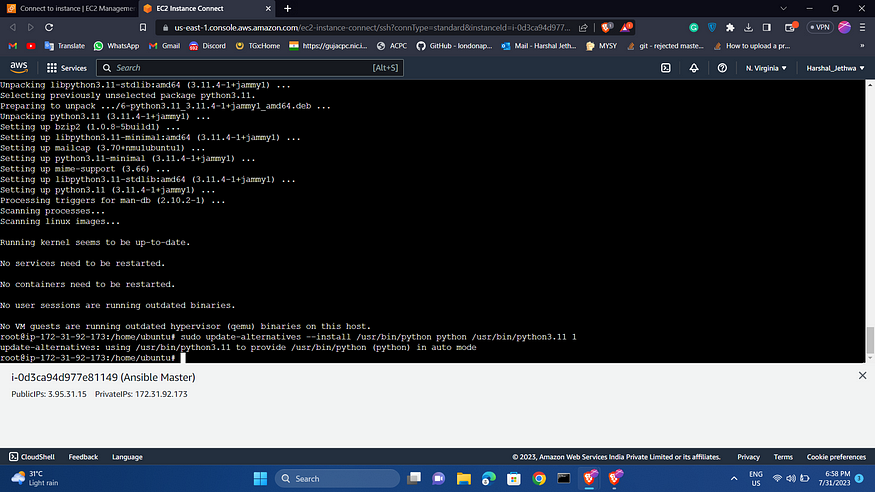
Install Ansible on only the Ansible Master node.
# Installation of python
$ apt install software-properties-common
$ add-apt-repository ppa:deadsnakes/ppa
$ apt install python3.11
$ sudo update-alternatives --install /usr/bin/python python /usr/bin/python3.11 1

# Install Ansible
$ sudo apt-add-repository ppa:ansible/ansible
$ sudo apt update
Now, you can check the version of Ansible using the following command:
$ ansible --version

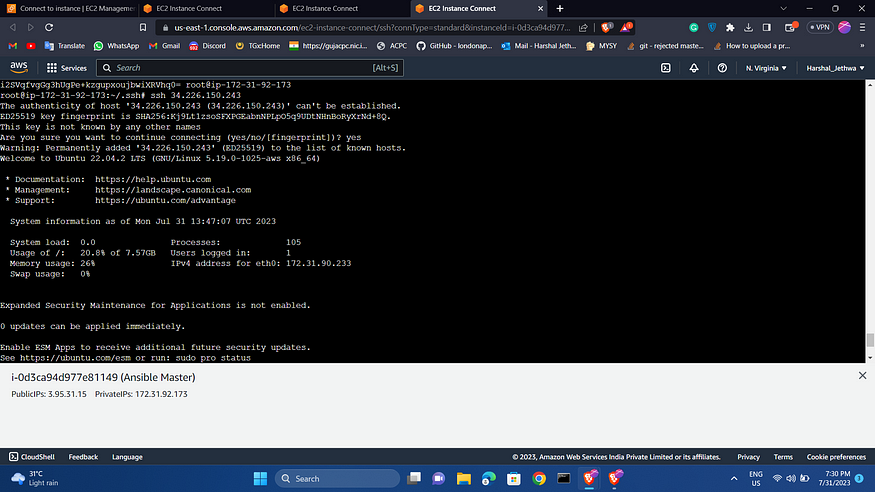
After installation. Now we have to make the connectivity between the Ansible master and the Remote machines.
Setup 2 :
Now you have to follow the below process for making the connection between the servers.
Now we have to use one command for making the connection between the servers.
$ ssh-keygen
Use the above command on all servers


In the master node, you have to go to the specific directory and copy the key of the master and paste it into the worker nodes as shown below.
Master Node:
$ cd ~/.ssh/
$ cat cat id_rsa.pub
After copying the above key you have to paste it to the remote servers as shown in the below process.
Worker Nodes:
$ cd ~/.ssh/
$ vi authorized_keys
Now, You have to paste into the remote server the key you copied from the above process.
After doing the process you will be able to access the server without the password as shown in the below image.

Setup 3:
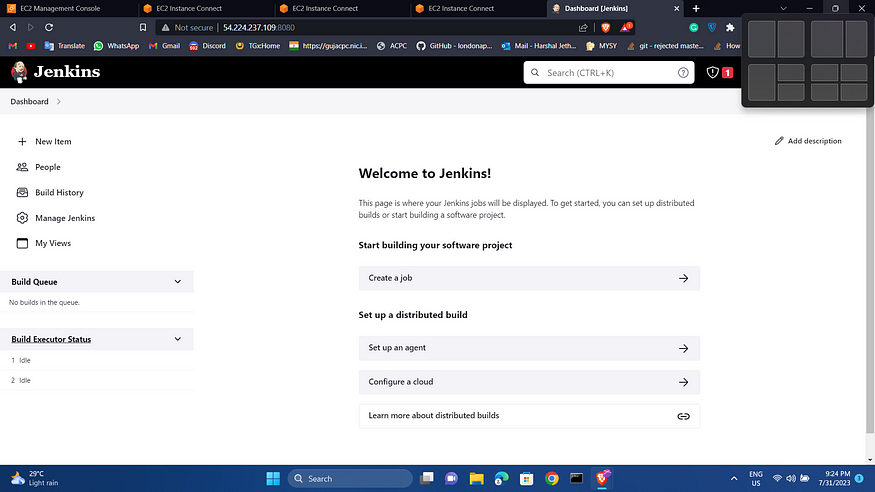
Install the Jenkins server in the Ansible master. By using these commands you will be able to access the Jenkins server.
# Installing the Jenkins Server.
$ sudo apt update
$ sudo apt install default-jdk -y
$ curl -fsSL https://pkg.jenkins.io/debian/jenkins.io-2023.key | sudo tee \
  /usr/share/keyrings/jenkins-keyring.asc > /dev/null
$ echo deb [signed-by=/usr/share/keyrings/jenkins-keyring.asc] \
  https://pkg.jenkins.io/debian binary/ | sudo tee \
  /etc/apt/sources.list.d/jenkins.list > /dev/null
$ sudo apt update
$ sudo apt install jenkins -y

# Installation of Git
$ sudo apt install git

For the Jenkins Password write the below command on Master Server
sudo cat /var/lib/jenkins/secrets/initialAdminPassword
After installing Jenkins. Now we have to integrate Jenkins with Ansible. For that, we need to follow the below process.
First of all, we need to install the plugins which are required for the Ansible playbooks to run and execute in the background.
Then we need to go to the Manage Jenkins AND THEN TO Tools section.
In that Tools section, If you scroll down a little bit. The Ansible tool will be available in that we need to ass the path of the Ansible master server.
Now we have to configure the playbooks and the pipelines for running the playbooks through Jenkins CI/CD.
Now go to Master Server and create a dir and then create file name hosts.
AND then paste the below code. NOTE : change server1 & server2 with your EC2 private IP address
[my-servers]
server1 ansible_host=172.31.90.233
server2 ansible_host=172.31.80.105

[all:vars]
ansible_python_interpreter=/usr/bin/python3
ansible_user=ubuntu
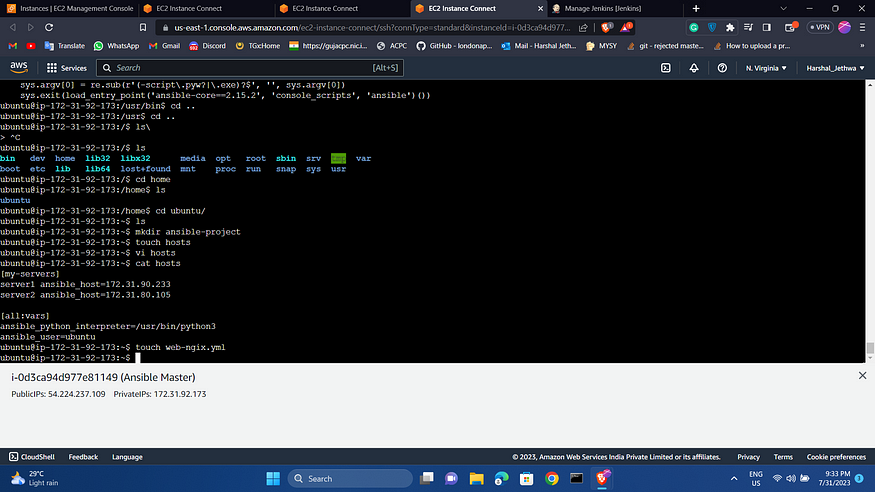
Now, Create the file name web-nginx.yaml and paste the below code.
- name: Configure nginx web server
  hosts: my-servers
  become: true
  become_user: root
  become_method: sudo
  tasks:
  - name: update apt
    apt:
      update_cache: yes
  - name: Install nginx
    apt:
      name: nginx
      state: latest
  - name: Start Nginx
    service:
      name: nginx
      state: started
      enabled: yes
  - name: Deploy web app
    copy:
      src: index.html
      dest: /var/www/html/

Now, Create file name index.html and paste below code
<!DOCTYPE html>
<html lang="en">

<head>
  <meta charset="UTF-8">
  <meta http-equiv="X-UA-Compatible" content="IE=edge">
  <meta name="viewport" content="width=device-width, initial-scale=1.0">
  <title>Week 6</title>
  <link rel="stylesheet" href="https://cdnjs.cloudflare.com/ajax/libs/font-awesome/5.15.3/css/all.min.css">
  <style>
    @import url('https://fonts.googleapis.com/css2?family=Pacifico&display=swap');

    body {
      margin: 0;
      box-sizing: border-box;
    }

    .container {
      line-height: 150%;
    }

    .header {
      display: flex;
      justify-content: space-between;
      align-items: center;
      padding: 15px;
      background-color: #e9e9e9;
    }

    .header h1 {
      color: #222222;
      font-size: 30px;
      font-family: 'Pacifico', cursive;
    }

    .header .social a {
      padding: 0 5px;
      color: #222222;
    }

    .left {
      float: left;
      width: 180px;
      margin: 0;
      padding: 1em;
    }

    .content {
      margin-left: 190px;
      border-left: 1px solid #d4d4d4;
      padding: 1em;
      overflow: hidden;
    }

    ul {
      list-style-type: none;
      margin: 0;
      padding: 0;
      font-family: sans-serif;
    }

    li a {
      display: block;
      color: #000;
      padding: 8px 16px;
      text-decoration: none;
    }

    li a.active {
      background-color: #84e4e2;
      color: white;
    }

    li a:hover:not(.active) {
      background-color: #29292a;
      color: white;
    }

    table {
      font-family: arial, sans-serif;
      border-collapse: collapse;
      width: 100%;
      margin: 30px 0;
    }

    td,
    th {
      border: 1px solid #dddddd;
      padding: 8px;
    }

    tr:nth-child(1) {
      background-color: #84e4e2;
      color: white;
    }

    tr td i.fas {
      display: block;
      font-size: 35px;
      text-align: center;
    }

    .footer {
      padding: 55px 20px;
      background-color: #2e3550;
      color: white;
      text-align: center;
    }
  </style>
</head>

<body>
  <div class="container">
    <header >
      <h1>Harshal Jethwa</h1>

    </header>
    <aside class="left">

      <ul>
        <li><a class="active" href="#home">Home</a></li>

      </ul>
      <br><br>
      <p>"Do something important in life. I convert green grass to code."<br>- Harshal </p>
    </aside>
    <div class="content">
      <h2>About </h2>
      <p>write ansible playbooks to install nginx and
        host an application on multiple servers,
        application deployment.
        Write Ansible roles to provision a
        production-ready MongoDB cluster
        Use CICD Pipeline to execute the playbooks
        Security and best practices should be kept
        in mind</p>
            <hr><br>
    </div>
</body>

</html>
Now, create Jenkinsfile and paste the below code
pipeline {
    agent any
    stages {
      stage('SCM Checkout') {
        steps {
           checkout([$class: 'GitSCM', branches: [[name: '*/main']], userRemoteConfigs: [[url: 'https://github.com/HARSHALJETHWA19/ansible-project.git']]])          }
      }
      stage('Execute Ansible') {
        steps {
           ansiblePlaybook credentialsId: 'ansible', disableHostKeyChecking: true, installation: 'ansible-copsc', inventory: 'hosts', playbook: 'web-nginx.yml'        }
      }
    }
}
The pipeline which is provided is a Jenkins pipeline, which is a collection of steps that can be used to automate the build, test, and deployment of software.
NOTE: Push all your above code to github

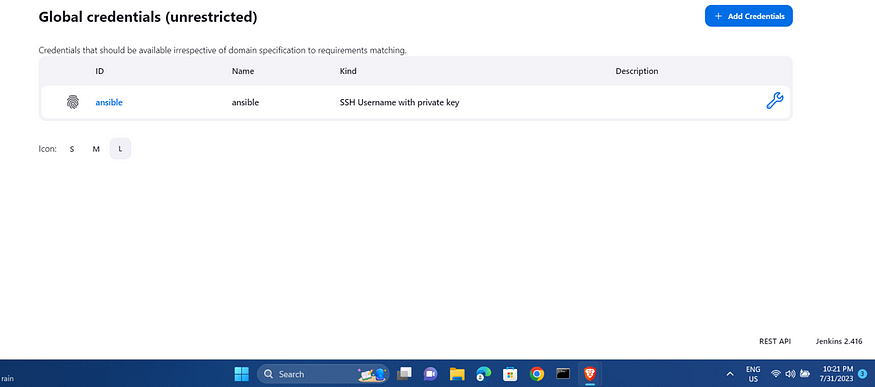
Go to Jenkins Credentials and The ansible ID is the details of the pem key which will be created when we are trying to access the servers. Try to paste the key in the below manner as shown in the image. Then we need to assign the ID and use it in the pipeline. and same for your GITHUB.
Assign the name for the pipeline and then proceed with the below steps as shown in the below image.

Click on the save and build the pipeline as shown in the below image. This was the Console Output which was shown below.


Goto Server 1:


And same for Server 2:

Github for this Project: github.com/HARSHALJETHWA19/ansible-project
Reference :
https://shreedhar1998.hashnode.dev/automating-nginx-installation-and-application-deployment-across-multiple-servers-using-ansible-jenkins
Learn Ansible with Real time Project! | by Sandeep Singh | Medium
Follow me :
Linkedin: https://www.linkedin.com/in/harshaljethwa/
GitHub: https://github.com/HARSHALJETHWA19/
Twitter: https://twitter.com/harshaljethwaa
Thank You!!!